I’m fairly new to photo editing and to Pixelmator, so I don’t know if this is the best way to do this or not. If works for me, so give it a go.
Here are the steps that I use:
1. Open the photo you want to vignette and do your basic editing.
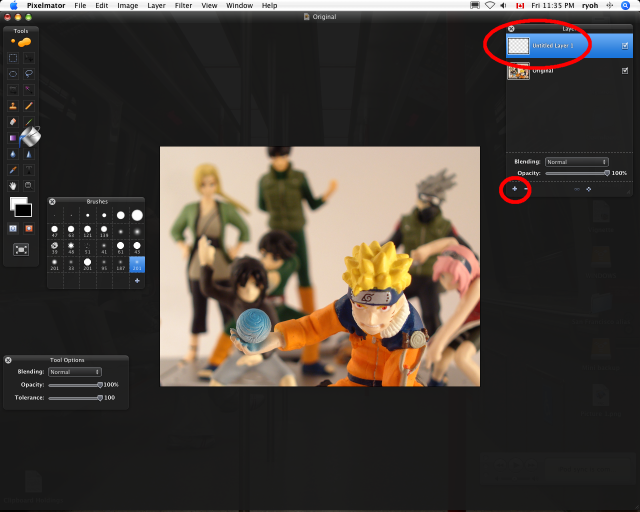
2. Create new layer (Vignette Layer)
3. Use the fill tool on the Vignette layer and fill the entire layer with black.
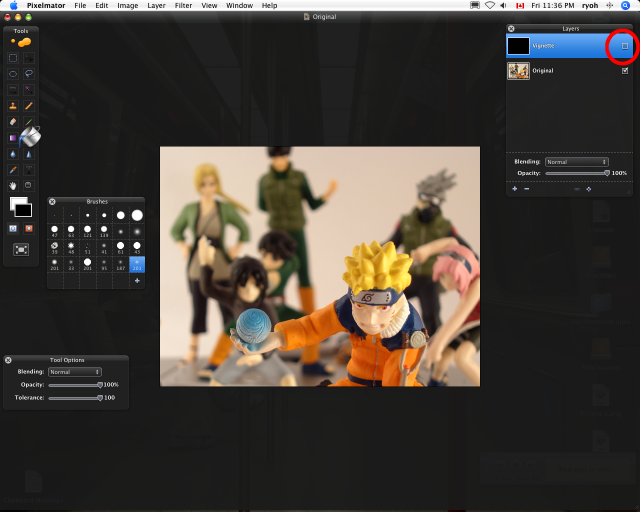
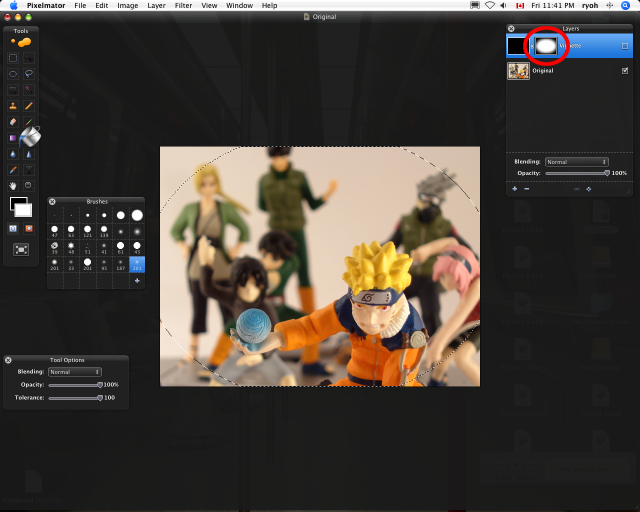
4. Right click on the Vignette Layer and add a Layer Mask.
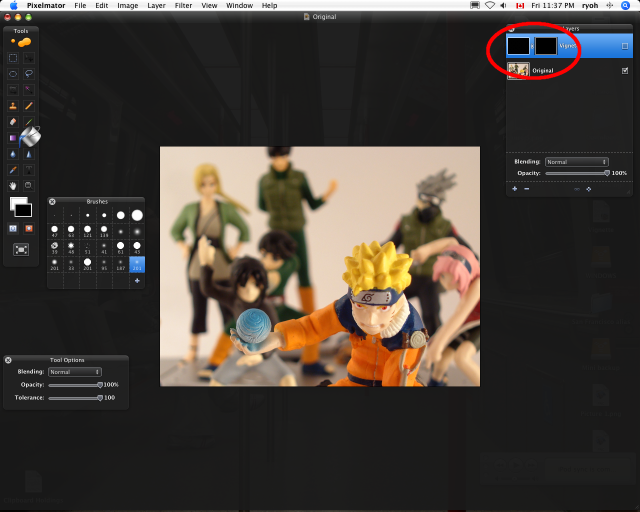
5. Make sure you have the Mask layer selected and uncheck this layer so that it hides the black and shows the original image below.
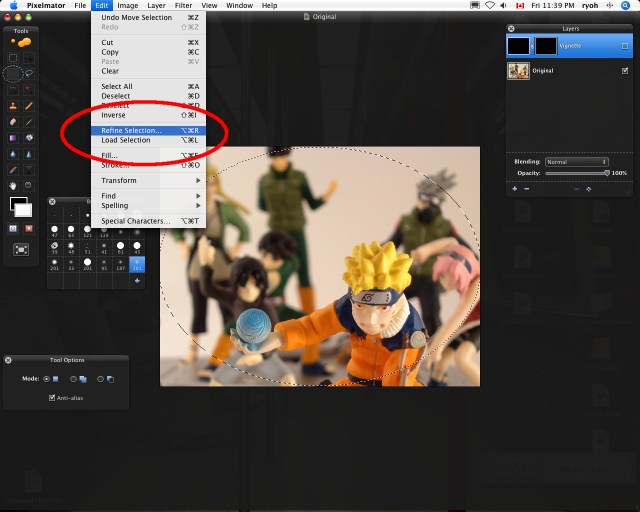
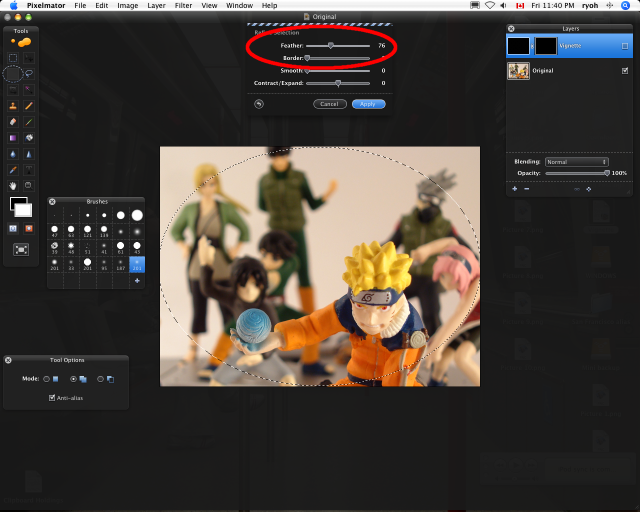
6. Use the ellipse tool to select the area you want to vignette (again, make sure you are editing the Layer Mask).
7. Once selected, go to Edit then select Refine Selection and slide the Feather bar to where you want it. I like between 70-100.
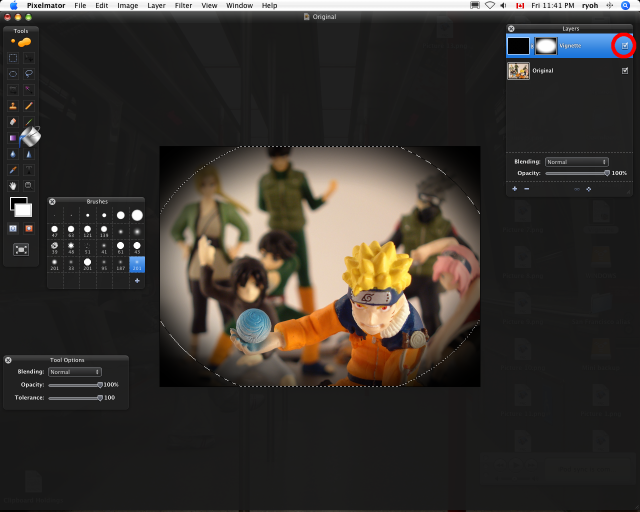
8. Once again, go to Edit and select Fill.
9. Choose White as your fill colour.
10. Re-check the Vignette Layer (so you can see) then adjust the Opacity of this layer to your liking.
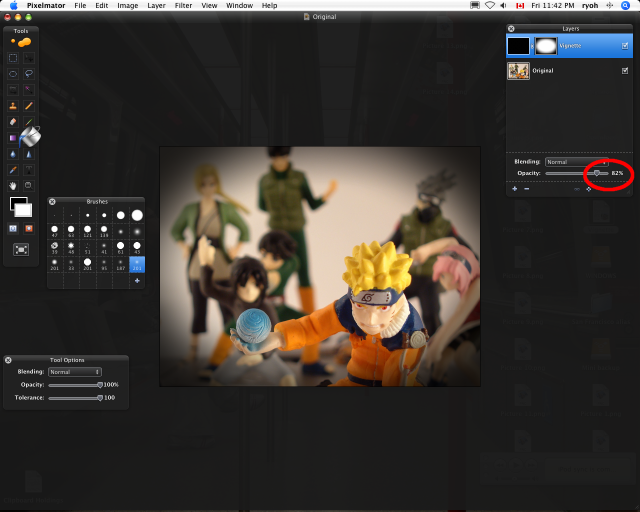
Viola! I know it sounds like a lot of work and steps, but it only takes a couple of minutes.
In search of Pixelmator tutorials, which is few and far between, I’ve noticed that there are many similarities between Photoshop and Pixelmator. If you can’t find info on PIxelmator, I would also suggest doing the same search on Photoshop. You may get a few hints like I did. One thing to keep in mind is that the Mask Layer uses opposite colours for the transparency: Pixelmator uses white and Photoshop uses black for the transparent parts.
Hope this helps and let me know if this isn’t working for you or there are any questions.


Thanks! I was searching the web for information to do this in Pixelmator as I have not used the app a lot.
🙂
No problem Larry. Thanks for visiting.
Nice tut! I was just wondering whether you can do a tut on selecting and extracting hair, using mask, in pixelmator. New to post-photo editing hoping you will be able to provide some tuts on that.
Thanks.
thanks so much for this, exactly what i needed!
Great tutorial. Thanks!
Didnt work for me, i think im doing something wrong. Instead of the outside of the ellipse having a vignette, it`s the inside that has it. what am i doing wrong ?
Hi Kaila,
I think it could be a couple of things. Make sure that you are filling the entire area of the “vignette layer” in black. That is what will give you that black border.
The other thing to check it the “layer mask.” New versions of Pixelmator has the colours reversed for masking. Everything you want to have shown through is black (the elipse in this case).
Hope this helps.
If you are still having problems, feel free to contact me through email.
I followed the steps but at the end my elipse turns out black in the middle and fades away to the edges.
what should i do.
Thank you so much for the tutorial… however, I too am
having issues with the ellipse being black and the outside is
normal. I have tried several different things to correct this with
no luck. Any help would be greatly appreciated as there aren’t many
tutorials for Pixelmator out there! Thanks so much!
Thanks for finally writing about >Pixelmator Vignette Tutorial | Ryoh’s
Blog <Liked it!
For folks stumbling on this tutorial from Google:
You can now use the “Vintage” effect that is built into newer versions of Pixelmator. This effect has options for setting various colors and creating a vignette.
This tutorial is still valid, and gives you a little more controls over the resulting vignette, but for a quick and dirty solution the new built in effect is much easier to work with.